_1762768699969.webp)

_1782530506402.webp)
Installation Tutorial for U-Shaped Aluminum Baffle Ceilings: Step-by-Step Explanation and Common Problem Avoidance
U-shaped aluminum baffle ceiling is the most widely used aluminum baffle product at present. Although the installation is relatively simple, if the construction is not carried out in accordance with the standard process, problems such as uneven lines, uneven gaps, uneven surface, loose abnormal noise and other problems are likely to occur, affecting the final decorative effect. This article introduces the standard installation method of U-shaped aluminum baffle ceilings and common problem avoidance measures in detail to help construction personnel make high-quality aluminum baffle ceiling projects.
The construction preparation stage is the prerequisite to ensure installation quality. The first is material preparation. Check whether the specification, color and thickness of the arrived aluminum baffles meet the design requirements, whether there are scratches, deformation, color difference and other problems on the surface, and whether the supporting keels, hangers, suspenders, expansion bolts and other accessories are complete. All materials are best produced in the same batch to avoid color difference. The second is tool preparation. Prepare laser level, impact drill, cutting machine, screwdriver, wrench, tape measure, ink fountain, gloves and other tools. Laser level is the core tool to ensure ceiling flatness, and products with qualified accuracy must be used. The third is site condition inspection. Confirm that all pipelines, fire protection, air conditioning, lamps and other equipment in the ceiling have been installed and accepted, the ceiling height and electromechanical equipment elevation have been confirmed, and the site wet work has been completed to avoid other types of work damaging the aluminum baffles after installation. The fourth is technical disclosure. Before construction, detailed technical disclosure should be carried out for workers, clarifying the installation direction, spacing, arching requirements and edge treatment methods of aluminum baffles. Make sample sections first, and carry out large-area construction after being accepted by Party A and the supervisor.
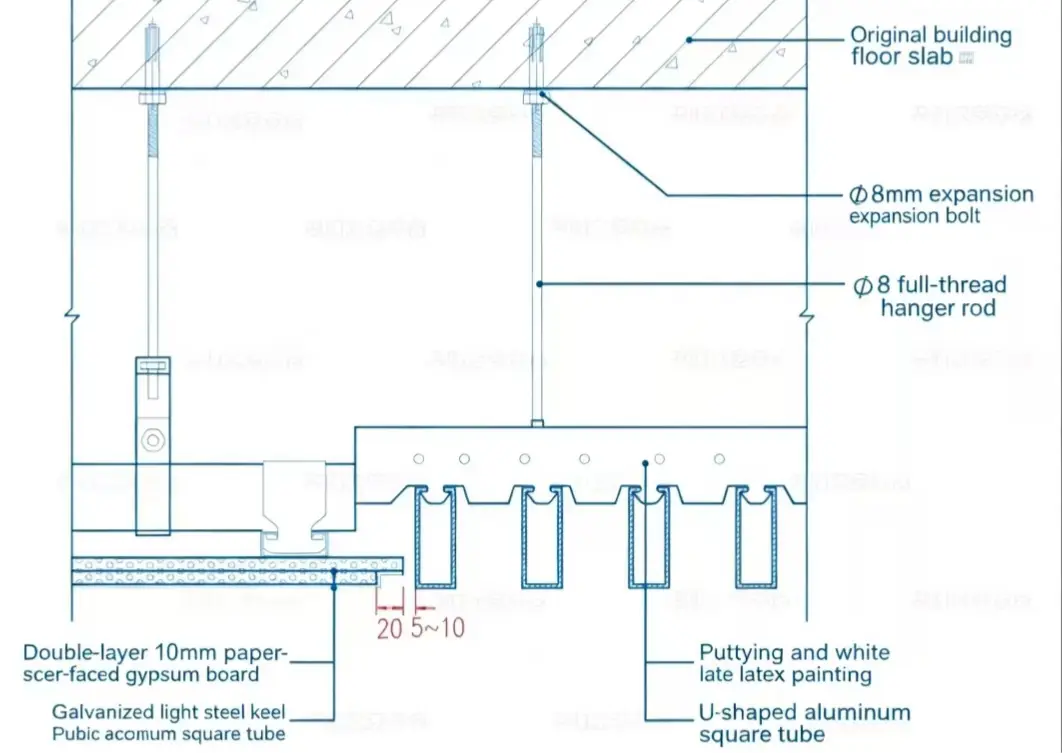
Installation Detail Drawing of U-shaped Aluminum Square Tube Ceiling
The first step is snapping line positioning. According to the design elevation, use a laser level to pop up the ceiling elevation line on the surrounding walls, with error not exceeding ±1mm. Then pop up the keel position line and suspender fixing point position on the top plate according to the installation direction and spacing of aluminum baffles. The suspender spacing is usually controlled at 1000mm-1200mm, maximum not exceeding 1500mm. The keel spacing is consistent with the suspender spacing. The installation direction of aluminum baffles is usually parallel to the long direction of the room, or determined according to design requirements. When snapping lines, pay attention to reserving the positions of lamps, air outlets, fire sprinklers and other equipment in advance to avoid cutting keels or suspenders during equipment installation.
The second step is installing suspenders. According to the popped suspender positions, drill holes in the top plate with an impact drill, the hole diameter matches the expansion bolt, the hole depth is not less than 60mm, then drive M8 or M10 expansion bolts, and install full-wire suspenders. The suspenders adopt galvanized through-wire screw rods. When installing, adjust the length of the suspenders to ensure that the lower end elevation is consistent. The suspender is not more than 300mm away from the end of the main keel. When the suspender length exceeds 1500mm, reverse support must be set to avoid the ceiling shaking up and down; when the suspender meets equipment, adjust the suspender position or add suspenders, and it is strictly forbidden to fix the suspender on equipment pipes.
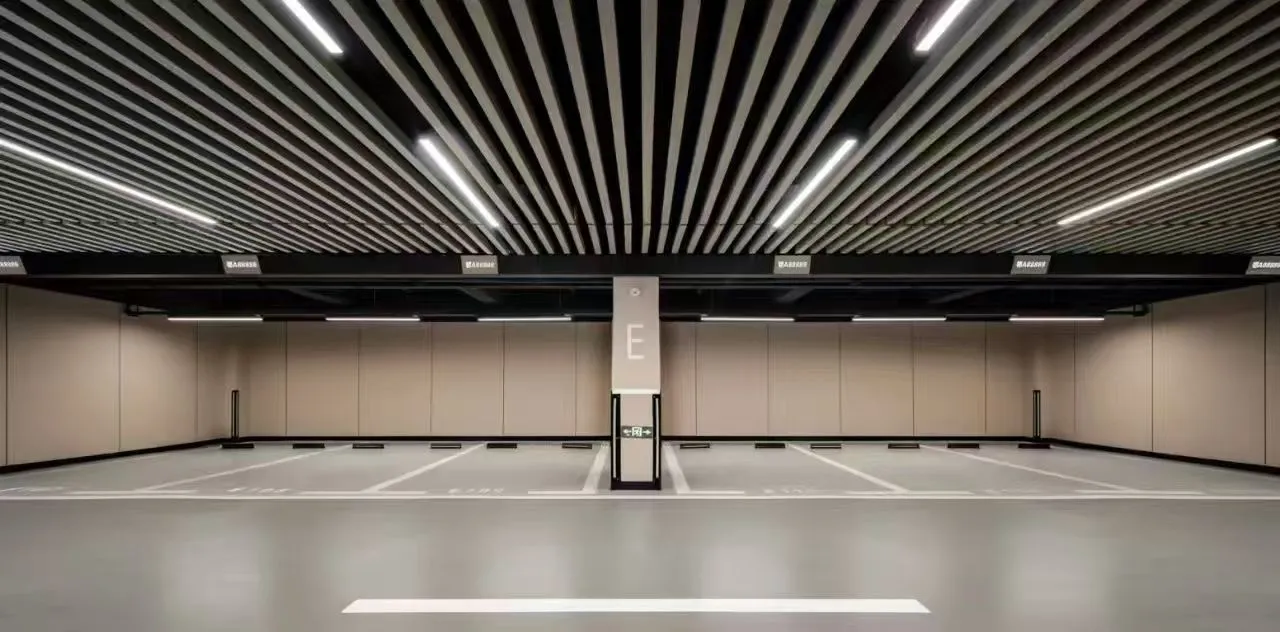
Aluminum Square Tube Ceiling for Underground Parking Garage
The third step is installing keels. U-shaped aluminum baffles usually adopt special light steel keels or aluminum keels. The keels are connected to the suspenders through hangers. When installing, first align and fix both ends with the elevation line, then pull the through line based on both ends, adjust the height and levelness of the middle keels to ensure that all keels are on the same horizontal plane. Keel joints should be staggered and not on the same straight line. After the keels are installed, comprehensive leveling should be carried out. For rooms with large areas, the ceiling should be properly arched, with the arching height being 1/200-1/300 of the short span of the room to avoid ceiling sagging. After the keels are leveled, check whether all hangers are firm and there is no looseness.
The fourth step is installing aluminum baffles. When installing, along the direction of the keels, clamp the two side edges of the U-shaped aluminum baffle on the spring clip teeth of the keel, and install them sequentially from one end. Wear clean gloves during installation to avoid oil stains on hands contaminating the baffle surface. Every time a few baffles are installed, check the straightness and flatness by pulling the through line, adjust the spacing between baffles to ensure uniform spacing, with error not exceeding ±1mm. When installing aluminum baffles, pay attention to the same direction. For baffles with protective film, pay attention to the same direction of the protective film, which is more convenient when tearing the film later. When encountering columns, walls, lamps and other positions, the baffles need to be cut according to the actual size. The cut should be flat, and the burrs should be polished off with fine sandpaper after cutting. Special U-shaped edge trimming strips or L-shaped edge trimming strips are used at the edge closing to ensure neat and beautiful edge closing.
The fifth step is equipment opening and adjustment. After the aluminum baffles are installed, open holes on the baffles according to the positions of lamps, air outlets, sprinklers, smoke detectors and other equipment. Use special hole openers for opening, the opening size matches the equipment, the position is accurate, polish off burrs after opening. When installing equipment, it should be flush with the baffle surface with uniform gaps. After all equipment is installed, comprehensively adjust the straightness and flatness of aluminum baffles, adjust skewed and loose baffles to ensure that all baffles are horizontal and vertical, with uniform gaps and flat surfaces.
The sixth step is cleaning and acceptance. After installation, tear off the protective film on the surface of aluminum baffles, wipe the surface stains with a clean soft cloth, do not wipe with hard objects or corrosive cleaners to avoid scratching the surface. During acceptance, check whether the variety, specification and color of aluminum baffles meet the design requirements, whether the installation is firm, whether there is looseness, whether the surface is flat, whether the lines are straight, whether the gaps are uniform, whether there are scratches, deformation, color difference and other defects, whether the equipment openings are neat, and whether the edge closing is beautiful.
Common problems and solutions: First, the ceiling is not flat and wavy, mainly due to inadequate keel leveling, excessive suspender spacing, loose suspenders. It is necessary to re-level the keels, add suspenders, and fix all hangers firmly; second, the baffle gaps are uneven, mainly because no through line is pulled during installation and there are errors in baffle dimensions. The through line must be pulled during installation, adjust the spacing while installing, and baffles with large errors should be picked out and replaced; third, there are scratches on the baffle surface, mainly because no gloves are worn during installation, the film is torn too early, and construction damage by other types of work in the later period. Clean gloves must be worn during installation, the protective film should be torn off before completion acceptance, and finished product protection should be done well; fourth, there is abnormal noise on the ceiling, mainly due to loose hangers, loose clamping between baffles and keels, and no expansion joints reserved. It is necessary to fix loose hangers, clamp the baffles tightly, and reserve expansion joints at appropriate positions to avoid abnormal noise caused by thermal expansion and cold contraction.